If you just want to use widgets on modern macOS and don’t care about the rest, the Widget Porting app is available to download at widgets.nikolan.net. This blog post goes over how they work and how I ported them.
Introduction
What are Dashboard Widgets?
I think the original author can describe them better than anyone else. Here’s a video of Steve Jobs introducing Dashboard in OS X Tiger at WWDC 2004:
Now onto my part:
Your screen is narrower than 900px - expand it and refresh to get a fancier intro text.
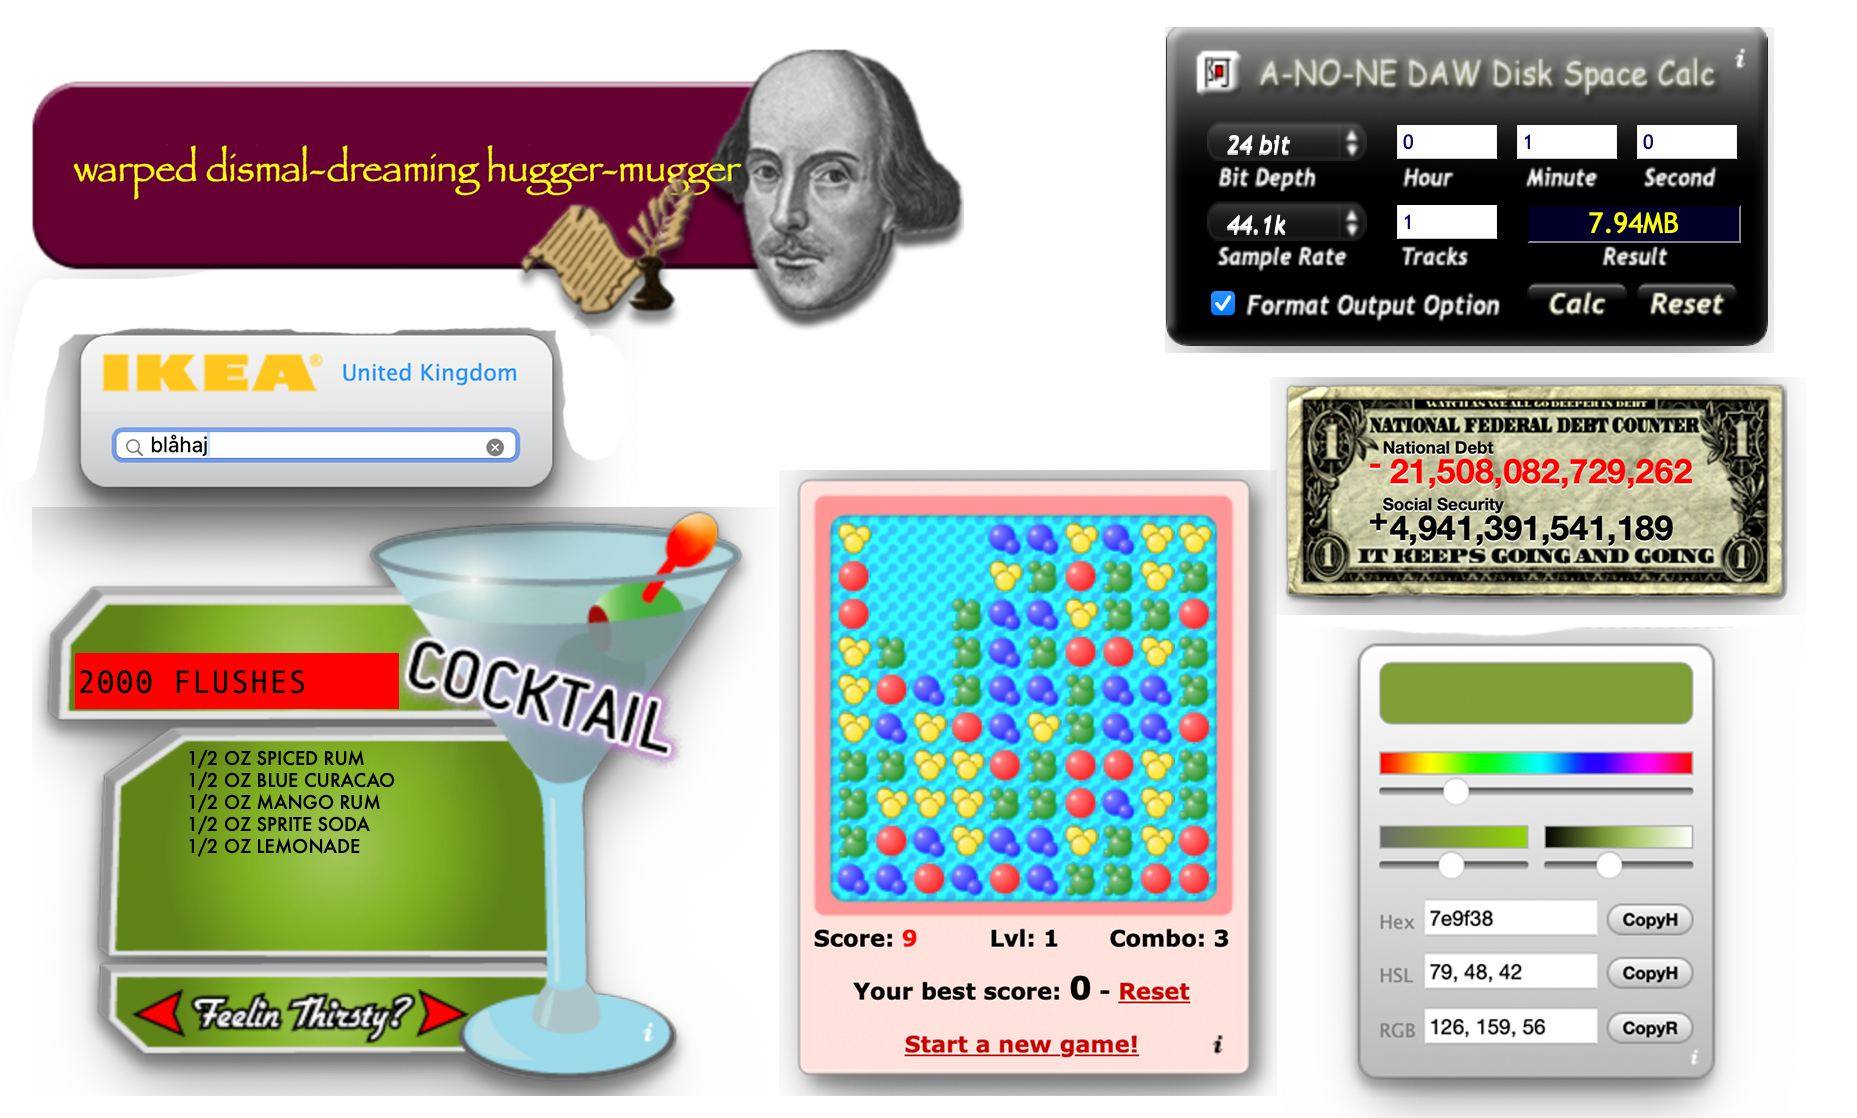
Dashboard widgets were introduced in Mac OS X 10.4 Tiger - they were these silly little skeuomorphic apps that ran on a separate desktop which you could access with the press of a key. Most had 2 sides - front side for most general interactions and back side for settings.
While there were a lot of silly and useless ones like some of the ones I showed in the picture above, there were actually many actual uses for them - it’s very sad most users never noticed they even existed.
Unfortunately, 14 years after their introduction, they were silently removed from macOS Mojave. While they existed, they were mostly neglected, and most of them looked the same throughout those years.
But it’s not all bad news - after a few days of tinkering around, I got old widgets to work on modern macOS! :D And it really wasn’t that hard.
Porting
File Structure
Before explaining how I got these to work, let’s first look at their file structure. At the base, they’re just web apps with some extras.
Just like macOS apps, widgets are packaged in what is called a bundle - essentially a folder meant to look like a file. Apps use the .app extension, while widgets use .wdgt. The widgets’ structure is actually pretty simple.
niko@Nikos-MacBook-Air:~$ tree
.
├── Default.png
├── Info.plist
├── version.plist
├── English.lproj
│   ├── InfoPlist.strings
│   └── localizedStrings.js
├── Images
│   ├── backside.png
│   ├── blue.png
│   ├── pink.png
│   ├── ...
│   └── yellow.png
├── Icon.png
├── Stickies.html
├── Stickies.css
└── Stickies.js
This is the structure of the Stickies widget. Now let’s go over all of the files and what they do:
Default.png
This image is shown while the widget is loading. After that, the widget overlays HTML elements on top of the image. Yes, most widgets overlay HTML elements on top of images instead of building from the ground up with HTML.
niko@Nikos-MacBook-Air:~$ open Default.png


Info.plist
A plist (short for property list) is basically the file format that Apple uses to store metadata and configuration for apps, widgets, system stuff, and others.
Unlike generic XML, plists have a standardized schema. They also are easier for the system to parse and can be read natively by APIs in Swift and Objective-C, which is why Apple uses them instead of XML.
This specific plist has the widget’s metadata. It can contain information like the widget’s name, author, identifier, window size, permissions, addons, entry HTML file and more.
niko@Nikos-MacBook-Air:~$ cat Info.plist
<?xml version="1.0" encoding="UTF-8"?>
<!DOCTYPE plist PUBLIC "-//Apple Computer//DTD PLIST 1.0//EN" "http://www.apple.com/DTDs/PropertyList-1.0.dtd">
<plist version="1.0">
<dict>
        <key>CFBundleIdentifier</key>
        <string>com.apple.widget.stickies</string>
        <key>CFBundleName</key>
        <string>Stickies</string>
        <key>CFBundleDisplayName</key>
        <string>Stickies</string>
        <key>CFBundleDevelopmentRegion</key>
        <string>English</string>
        <key>CFBundleShortVersionString</key>
        <string>2.0.0</string>
        <key>CFBundleVersion</key>
        <string>2.0.0</string>
        <key>Height</key>
        <integer>206</integer>
        <key>MainHTML</key>
        <string>Stickies.html</string>
        <key>Width</key>
        <integer>225</integer>
        <key>CloseBoxInsetX</key>
        <integer>11</integer>
        <key>CloseBoxInsetY</key>
        <integer>6</integer>
</dict>
</plist>
version.plist
I couldn’t find much about this file, but it seems to be information about the widget’s version.
niko@Nikos-MacBook-Air:~$ cat version.plist
<?xml version="1.0" encoding="UTF-8"?>
<!DOCTYPE plist PUBLIC "-//Apple//DTD PLIST 1.0//EN" "http://www.apple.com/DTDs/PropertyList-1.0.dtd">
<plist version="1.0">
<dict>
        <key>BuildVersion</key>
        <string>5</string>
        <key>CFBundleShortVersionString</key>
        <string>2.0.0</string>
        <key>CFBundleVersion</key>
        <string>2.0.0</string>
        <key>ProjectName</key>
        <string>StickiesWidget</string>
        <key>SourceVersion</key>
        <string>180100</string>
</dict>
</plist>
*.lproj
These are folders which contain a bunch of localized strings in the language that is the folder’s name.
niko@Nikos-MacBook-Air:~$ cat English.lproj/localizedStrings.js
var localizedStrings = new Array();

localizedStrings['Paper Color:'] = 'Paper Color:';
localizedStrings['Font:'] = 'Font:';
localizedStrings['Done'] = 'Done';
localizedStrings['Auto'] = 'Auto';
niko@Nikos-MacBook-Air:~$ cat French.lproj/localizedStrings.js
var localizedStrings = new Array();

localizedStrings['WidgetDisplayName:'] = 'adhésif :';

localizedStrings['Paper Color:'] = 'Couleur du papier :';
localizedStrings['Font:'] = 'Police :';
localizedStrings['Done'] = 'Terminé';
localizedStrings['Auto'] = 'Auto';
localizedStrings['FontSize'] = 'Taille de la police'; // for aria-label of secondary select
Icon.png
The icon of the widget - as far as I know this is only shown in the pane where you add/remove widgets to your dashboard.
Icons of all Widgets bundled with OS X 10.5


The Images folder contains images for use by the widget, and the rest of the files in the root directory are generally the widget’s code.
Trying to load them in a browser
If widgets are just webapps, then you should be able to just open them in a web browser, right? Let’s try it with the Calculator widget.

The calculator widget works perfectly! Out of all of the built-in widgets, only the calculator works without any modifications. Now let’s try Stickies.
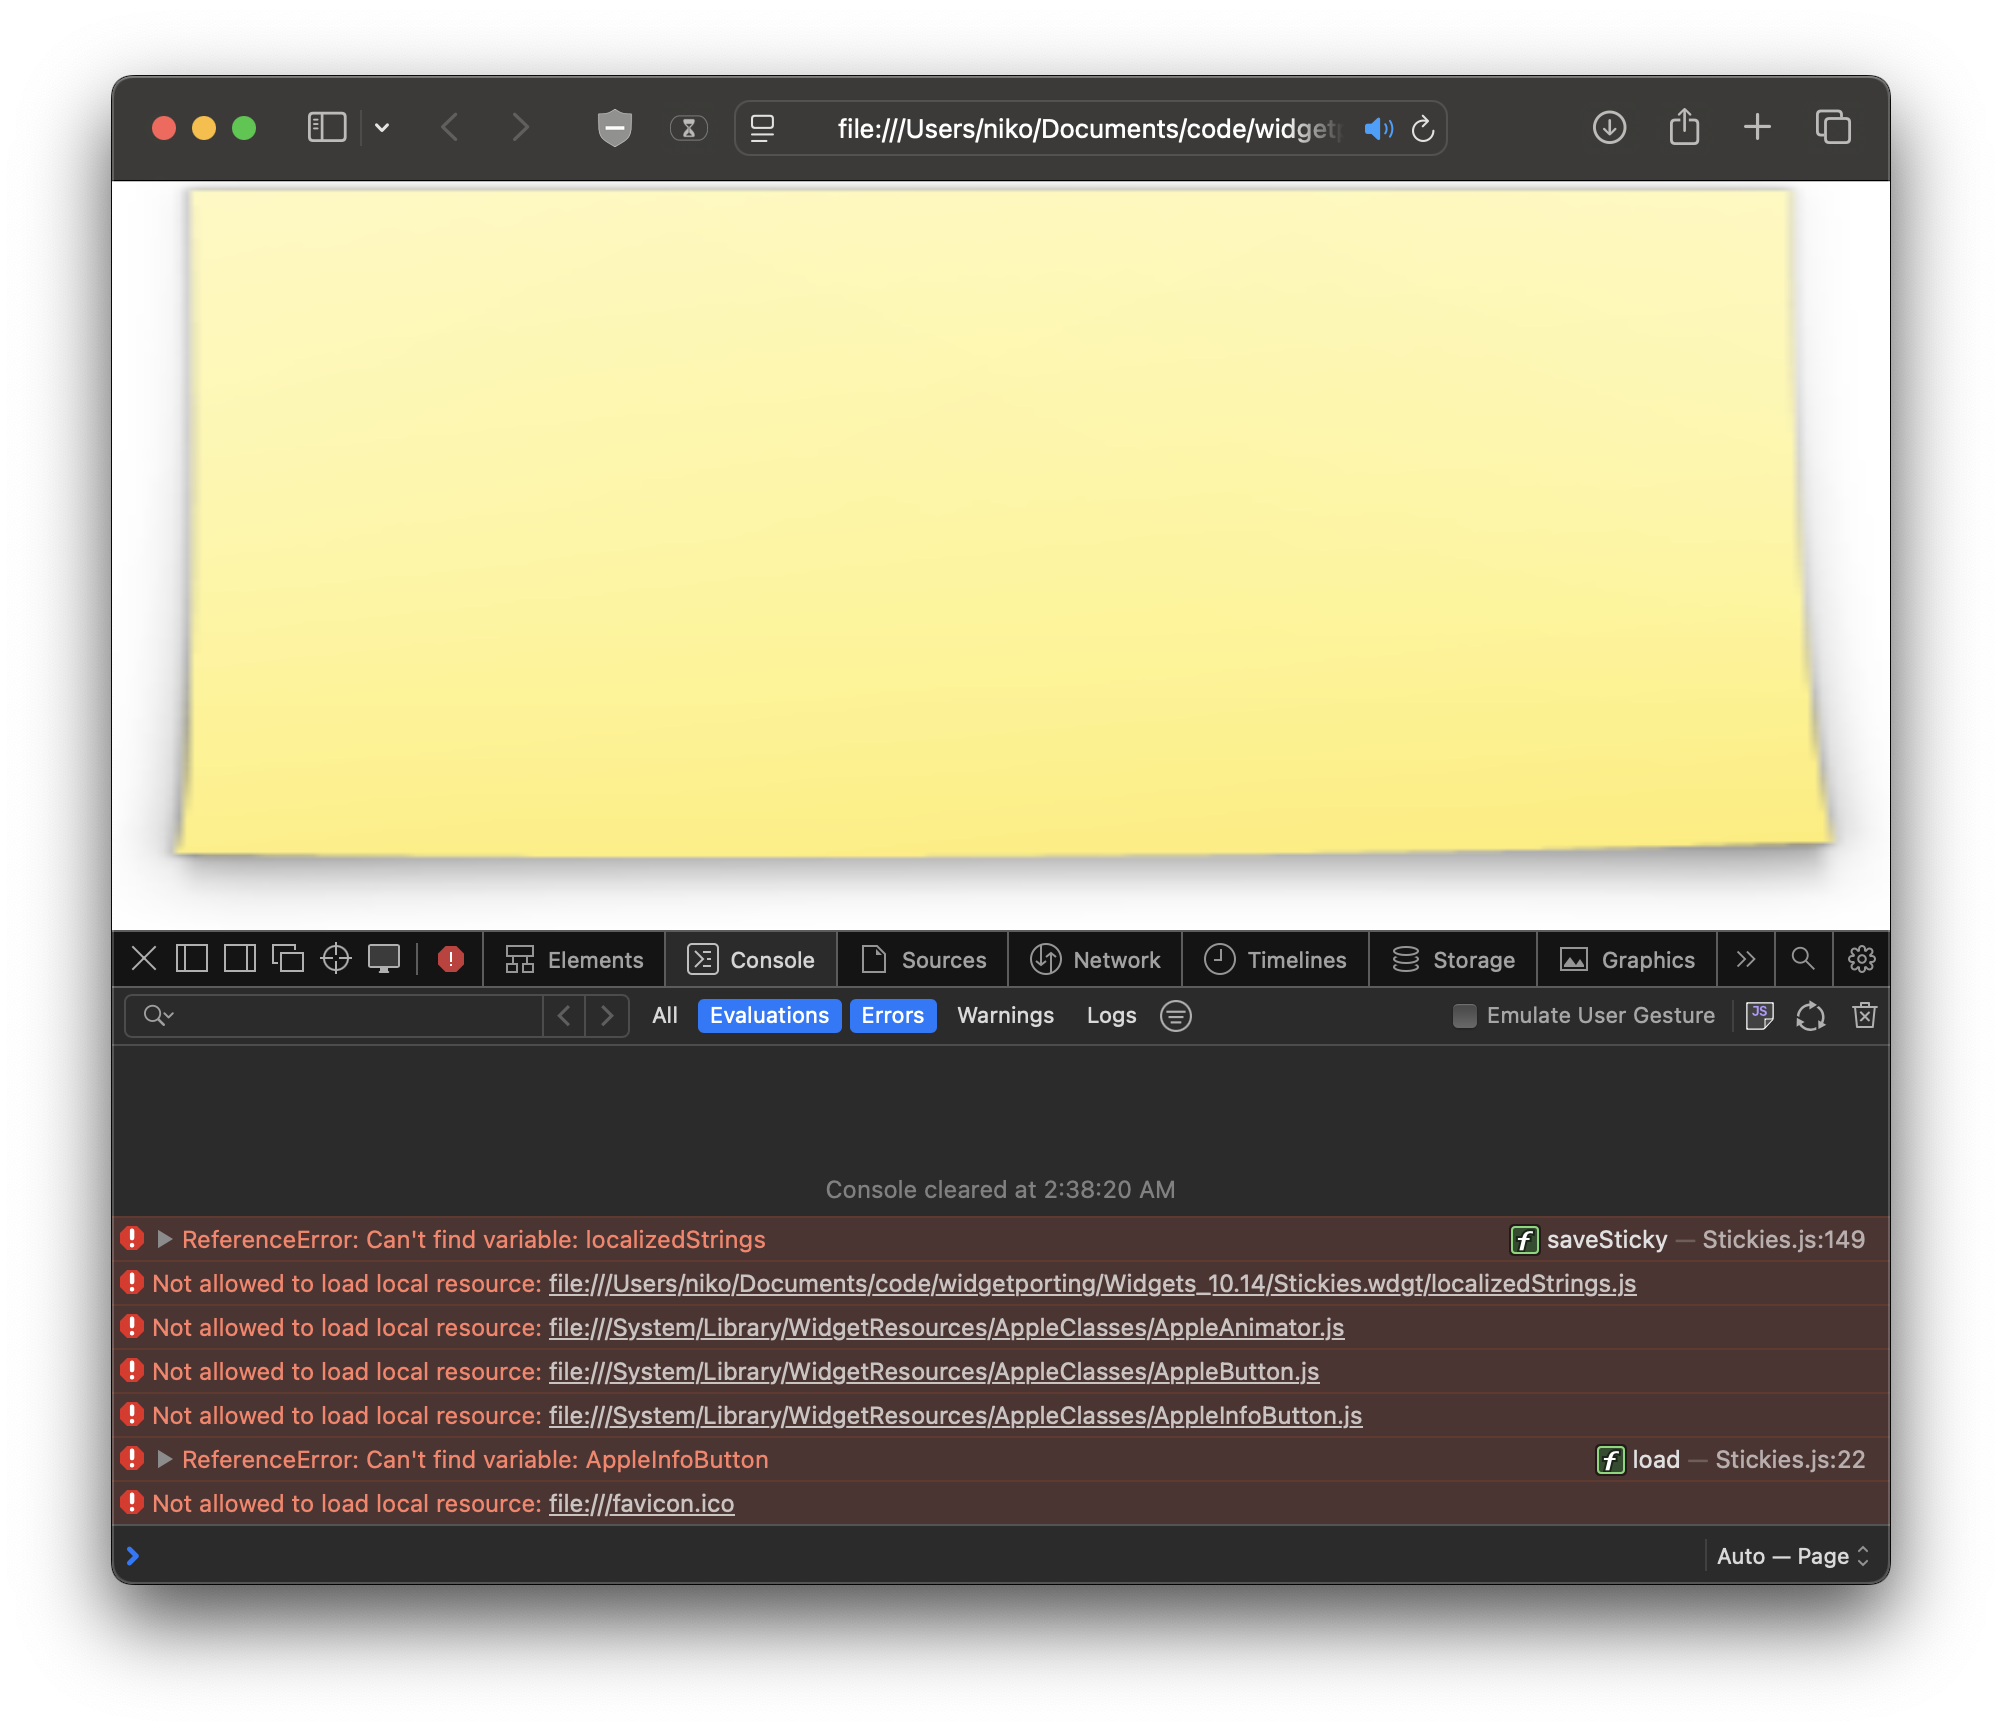
Not allowed to load local resource: file:///System/Library/WidgetResources/AppleClasses/AppleAnimator.js ?
These widgets use some shared resources, which are stored at /System/Library/WidgetResources. Modern macOS versions have strict sandboxing, so the web browser isn’t able to access that directory. Even then, those files don’t exist anymore in modern versions of macOS.
Even with all those errors, the base functionality of the widget is still barely there! I can still type normally, although refreshing the webpage resets all contents and none of the other functions work.
I tried to make the widget a little more functional by copying over a real WidgetResources folder from an OS X 10.5 installation.
That WidgetResources folder includes shared resources for things like:
- Logic for switching to the back side (widget settings and stuff)
- UI for buttons, scrollbars, and other elements
- Parsers for some specific widgets (will go into detail later)
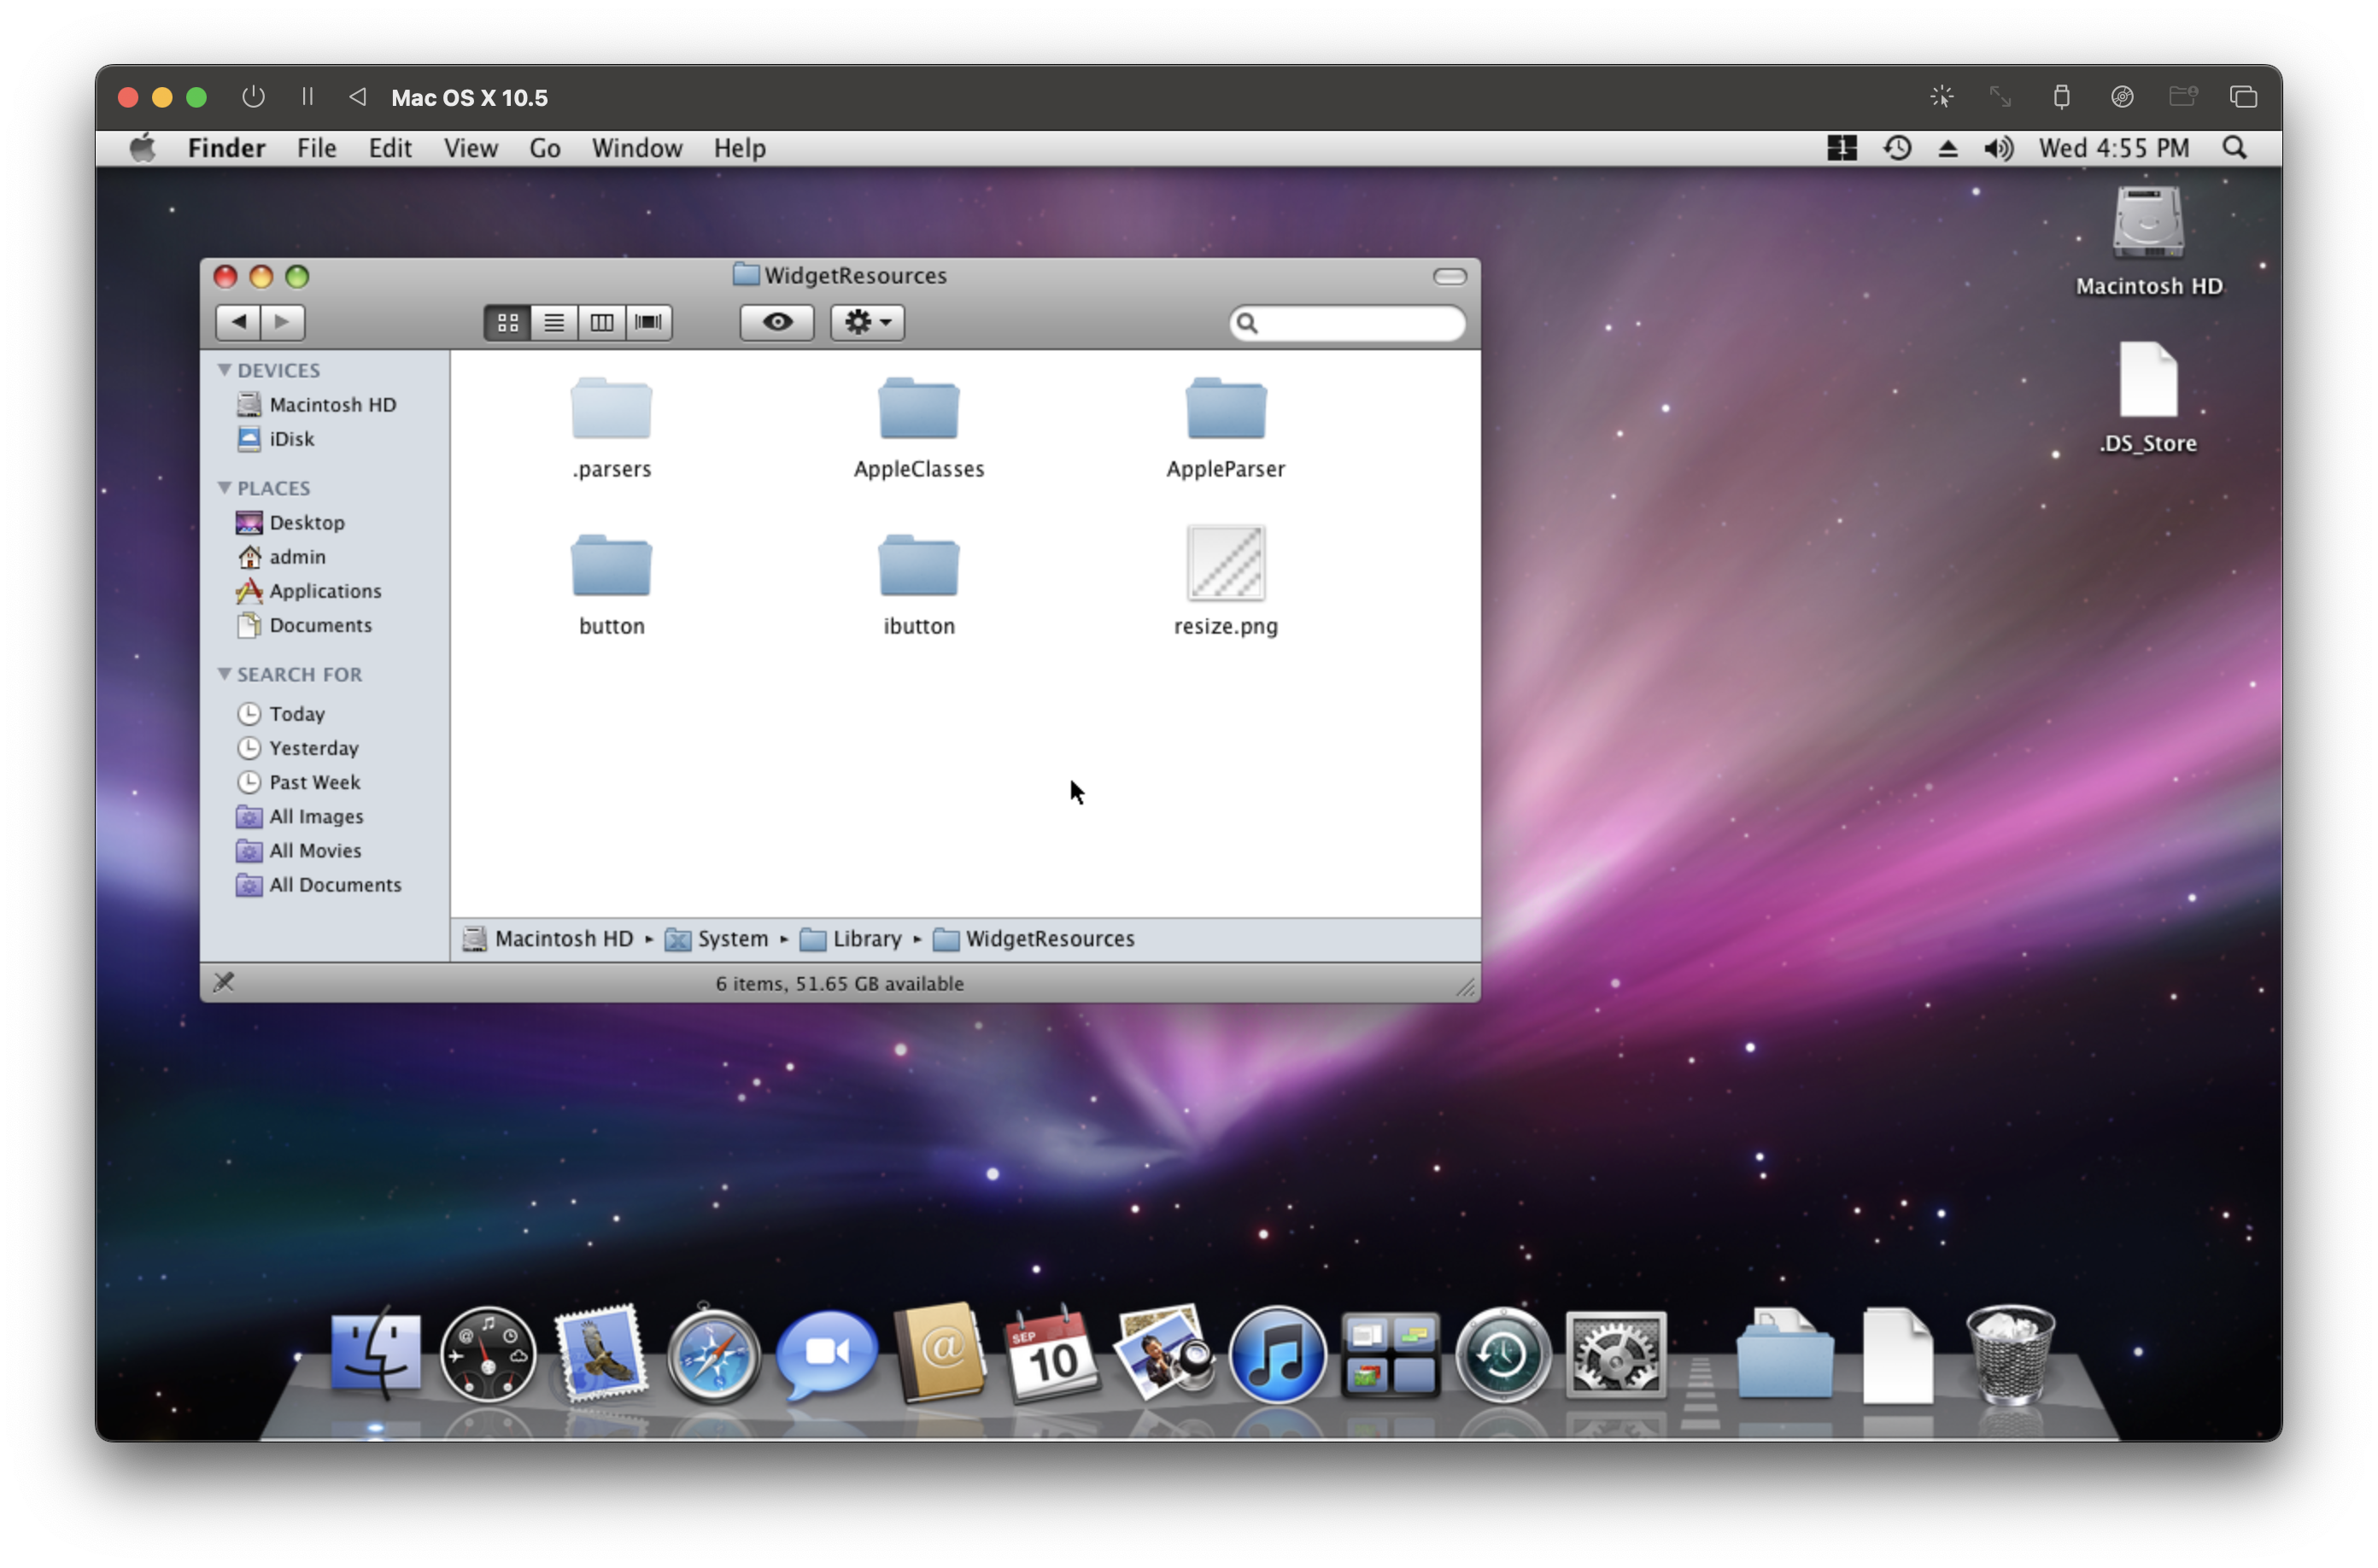
After setting up an OS X 10.5 VM in UTM, I copied the WidgetResources folder to my host.
Inside the MainHTML file, the widget tries to load several system scripts:
<script type="text/javascript" src="file:///System/Library/WidgetResources/AppleClasses/AppleAnimator.js" charset="utf-8"></script>
<script type="text/javascript" src="file:///System/Library/WidgetResources/AppleClasses/AppleButton.js" charset="utf-8"></script>
<script type="text/javascript" src="file:///System/Library/WidgetResources/AppleClasses/AppleInfoButton.js" charset="utf-8"></script>
I’m going to remove the file:///System/Library/ part from each line and move the WidgetResources into the .wdgt folder.
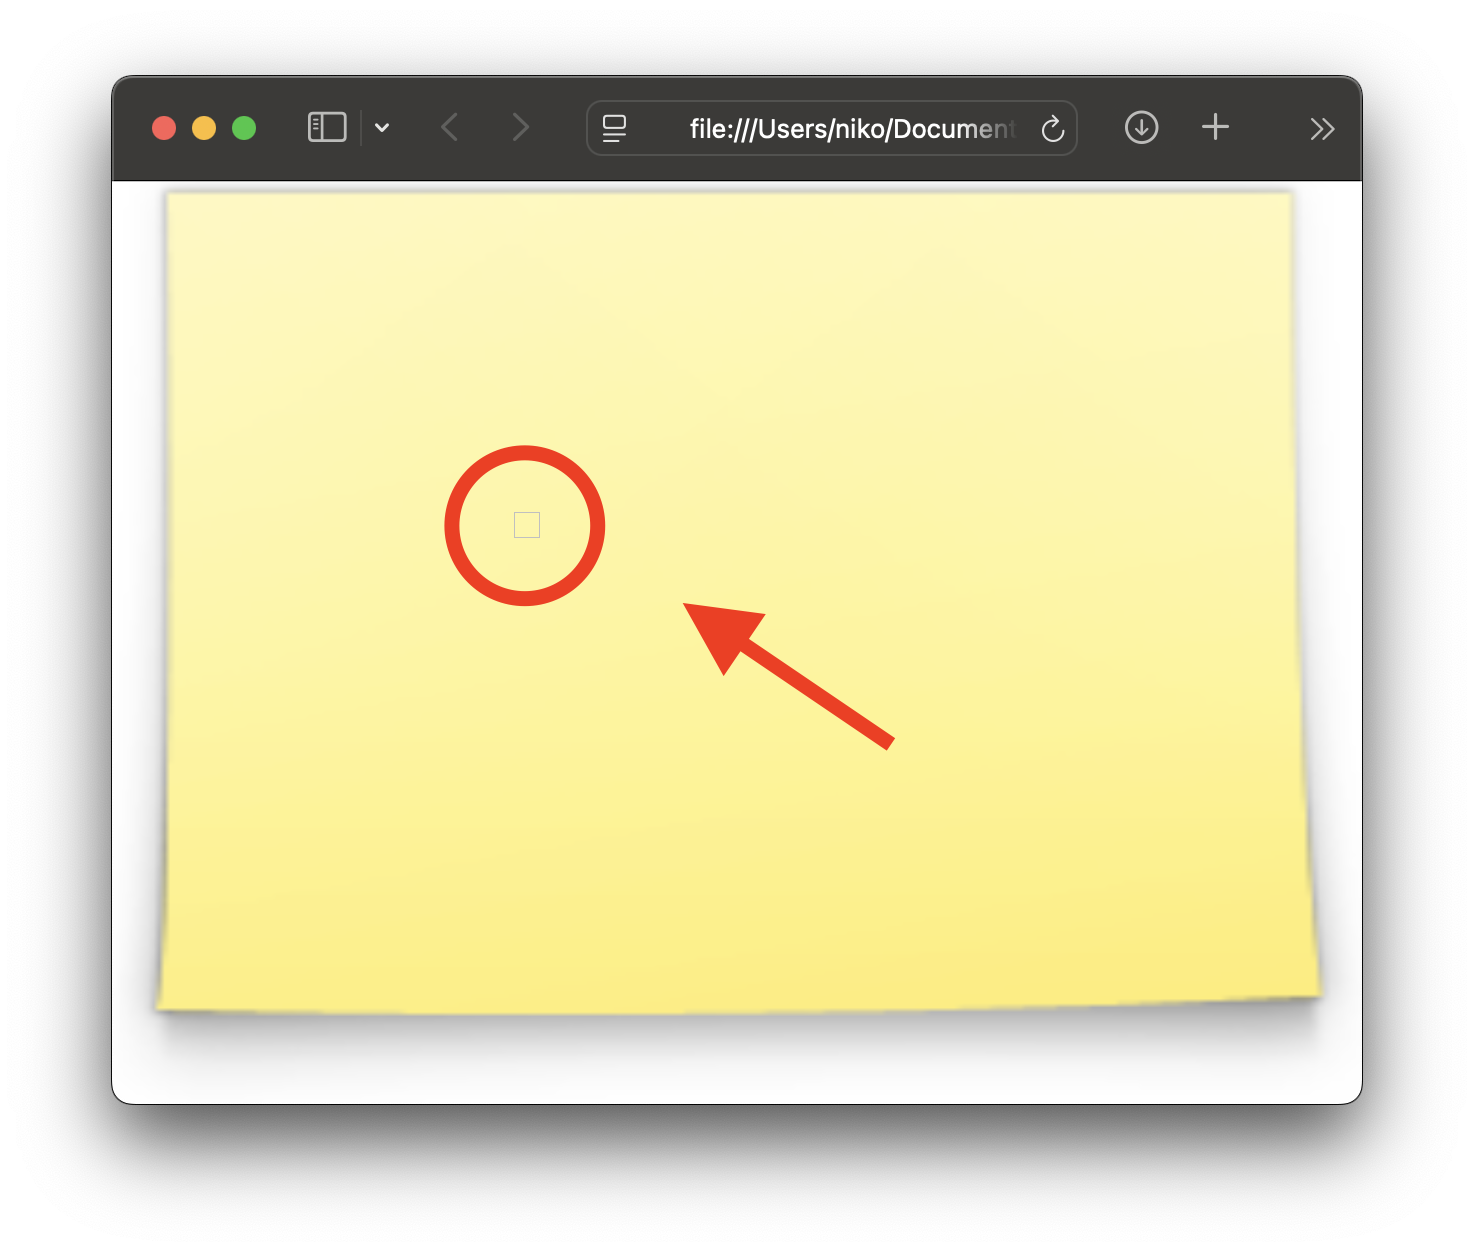

It looks about the same, but if you look closely there’s a little square that appears when you hover over the widget. Following the Width and Height elements from Info.plist, that button would be in the bottom right corner of the widget.
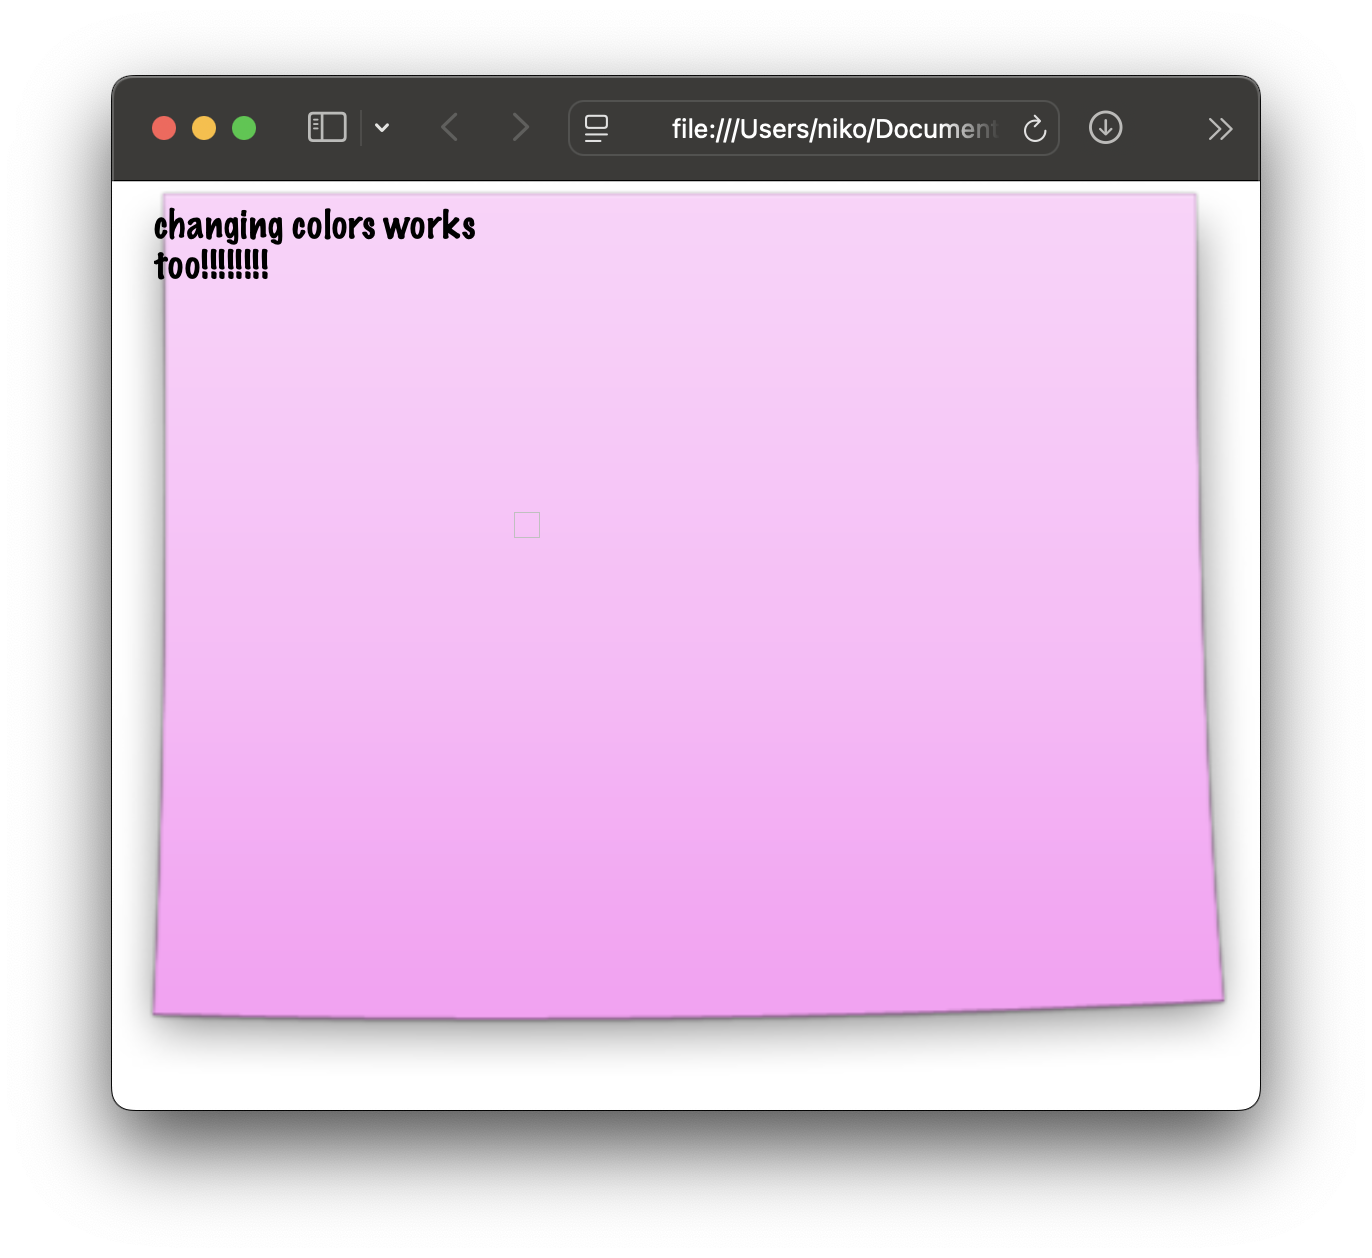
Clicking it flips the widget to its backside. The backside lets you change the color of the paper, font family, and size. Some functionality has been successfully restored :D
Windowing Them
Now let’s make this system a bit better and try some more widgets.
First off, let’s fix the square button and make it an “i” like it’s supposed to be. The console shows: Not allowed to load local resource: file:///System/Library/WidgetResources/ibutton/black_i.png.
Even though I modified the code to point to the local WidgetResources folder, this error was actually coming from a file within the folder itself. Those files also use absolute paths to refer to their own resources. Using find and replace to remove all instances of file:///System/Library/ fixed it, and the i button appears instead of a square now!
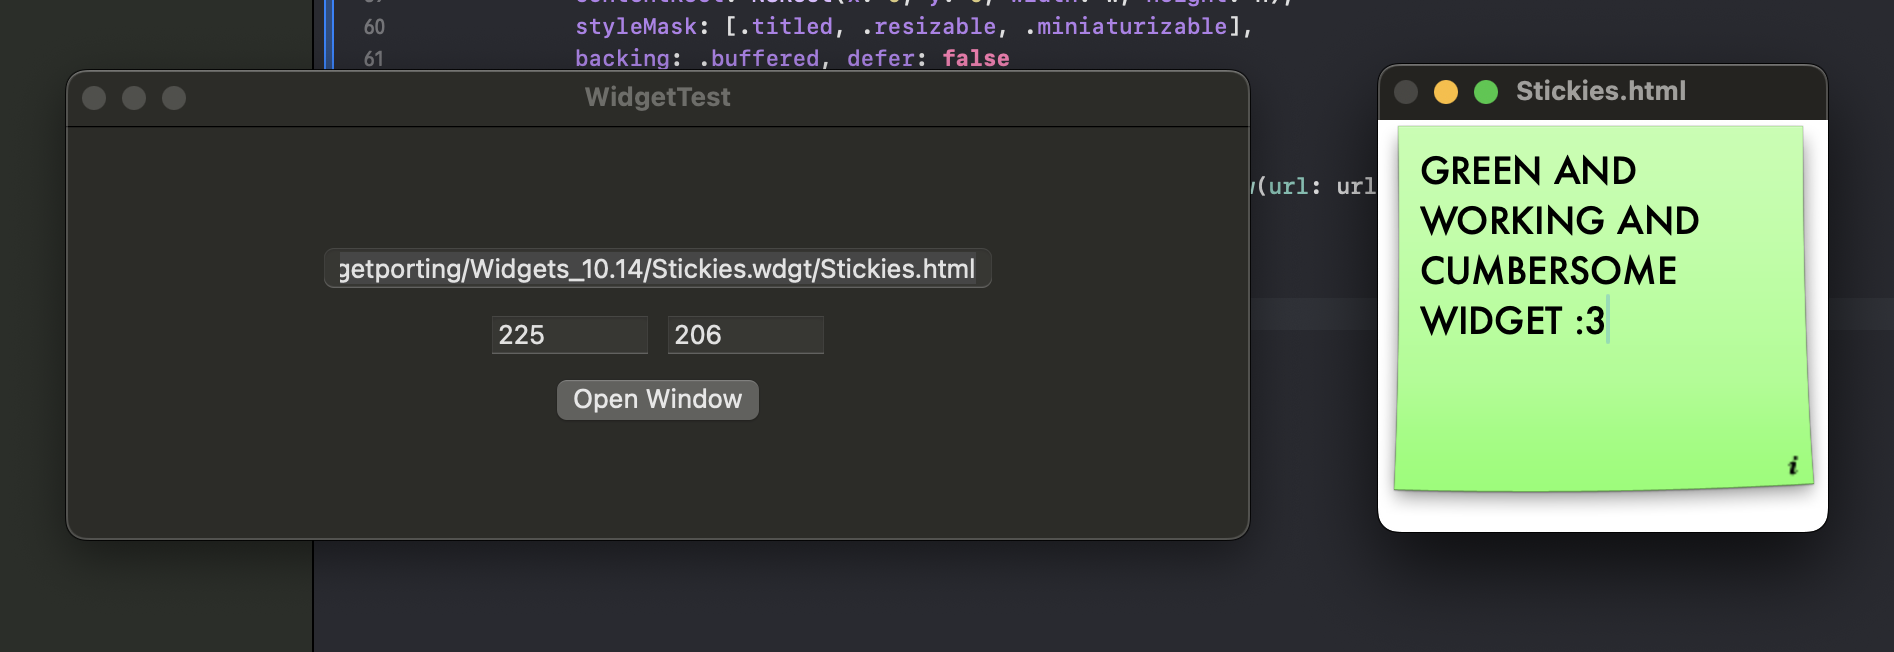
Now let’s address the window size. Unfortunately, Safari doesn’t let you make the window as small as it should be, so I decided to try a basic WebKit wrapper with custom size controls.
WidgetTestApp.swift
import SwiftUI
import WebKit

struct WebView: NSViewRepresentable {
    let url: URL

    func makeNSView(context: Context) -> WKWebView {
        let config = WKWebViewConfiguration()
        config.preferences.setValue(true, forKey: "developerExtrasEnabled") // enable devtools
        let webView = WKWebView(frame: .zero, configuration: config)
        webView.loadFileURL(url, allowingReadAccessTo: url.deletingLastPathComponent())
        return webView
    }

    func updateNSView(_ nsView: WKWebView, context: Context) {}
}

struct WebWindow: View {
    let url: URL

    var body: some View {
        WebView(url: url)
    }
}

@main
struct WidgetTestApp: App {
    @State private var path: String = ""
    @State private var width: String = "800"
    @State private var height: String = "600"

    var body: some Scene {
        WindowGroup {
            VStack(spacing: 12) {
                TextField("Path to .html file", text: $path)
                    .textFieldStyle(RoundedBorderTextFieldStyle())
                    .padding(.horizontal)
                HStack {
                    TextField("Width", text: $width)
                        .frame(width: 80)
                    TextField("Height", text: $height)
                        .frame(width: 80)
                }
                Button("Open Window") {
                    openWindow()
                }
            }
            .padding()
            .frame(width: 400, height: 200)
        }
    }

    private func openWindow() {
        guard let url = URL(string: "file://\(path)") else { return }
        let w = Int(width) ?? 800
        let h = Int(height) ?? 600

        let window = NSWindow(
            contentRect: NSRect(x: 0, y: 0, width: w, height: h),
            styleMask: [.titled, .resizable, .miniaturizable],
            backing: .buffered, defer: false
        )
        window.title = url.lastPathComponent
        window.center()
        window.contentView = NSHostingView(rootView: WebWindow(url: url))
        window.makeKeyAndOrderFront(nil)
    }
}
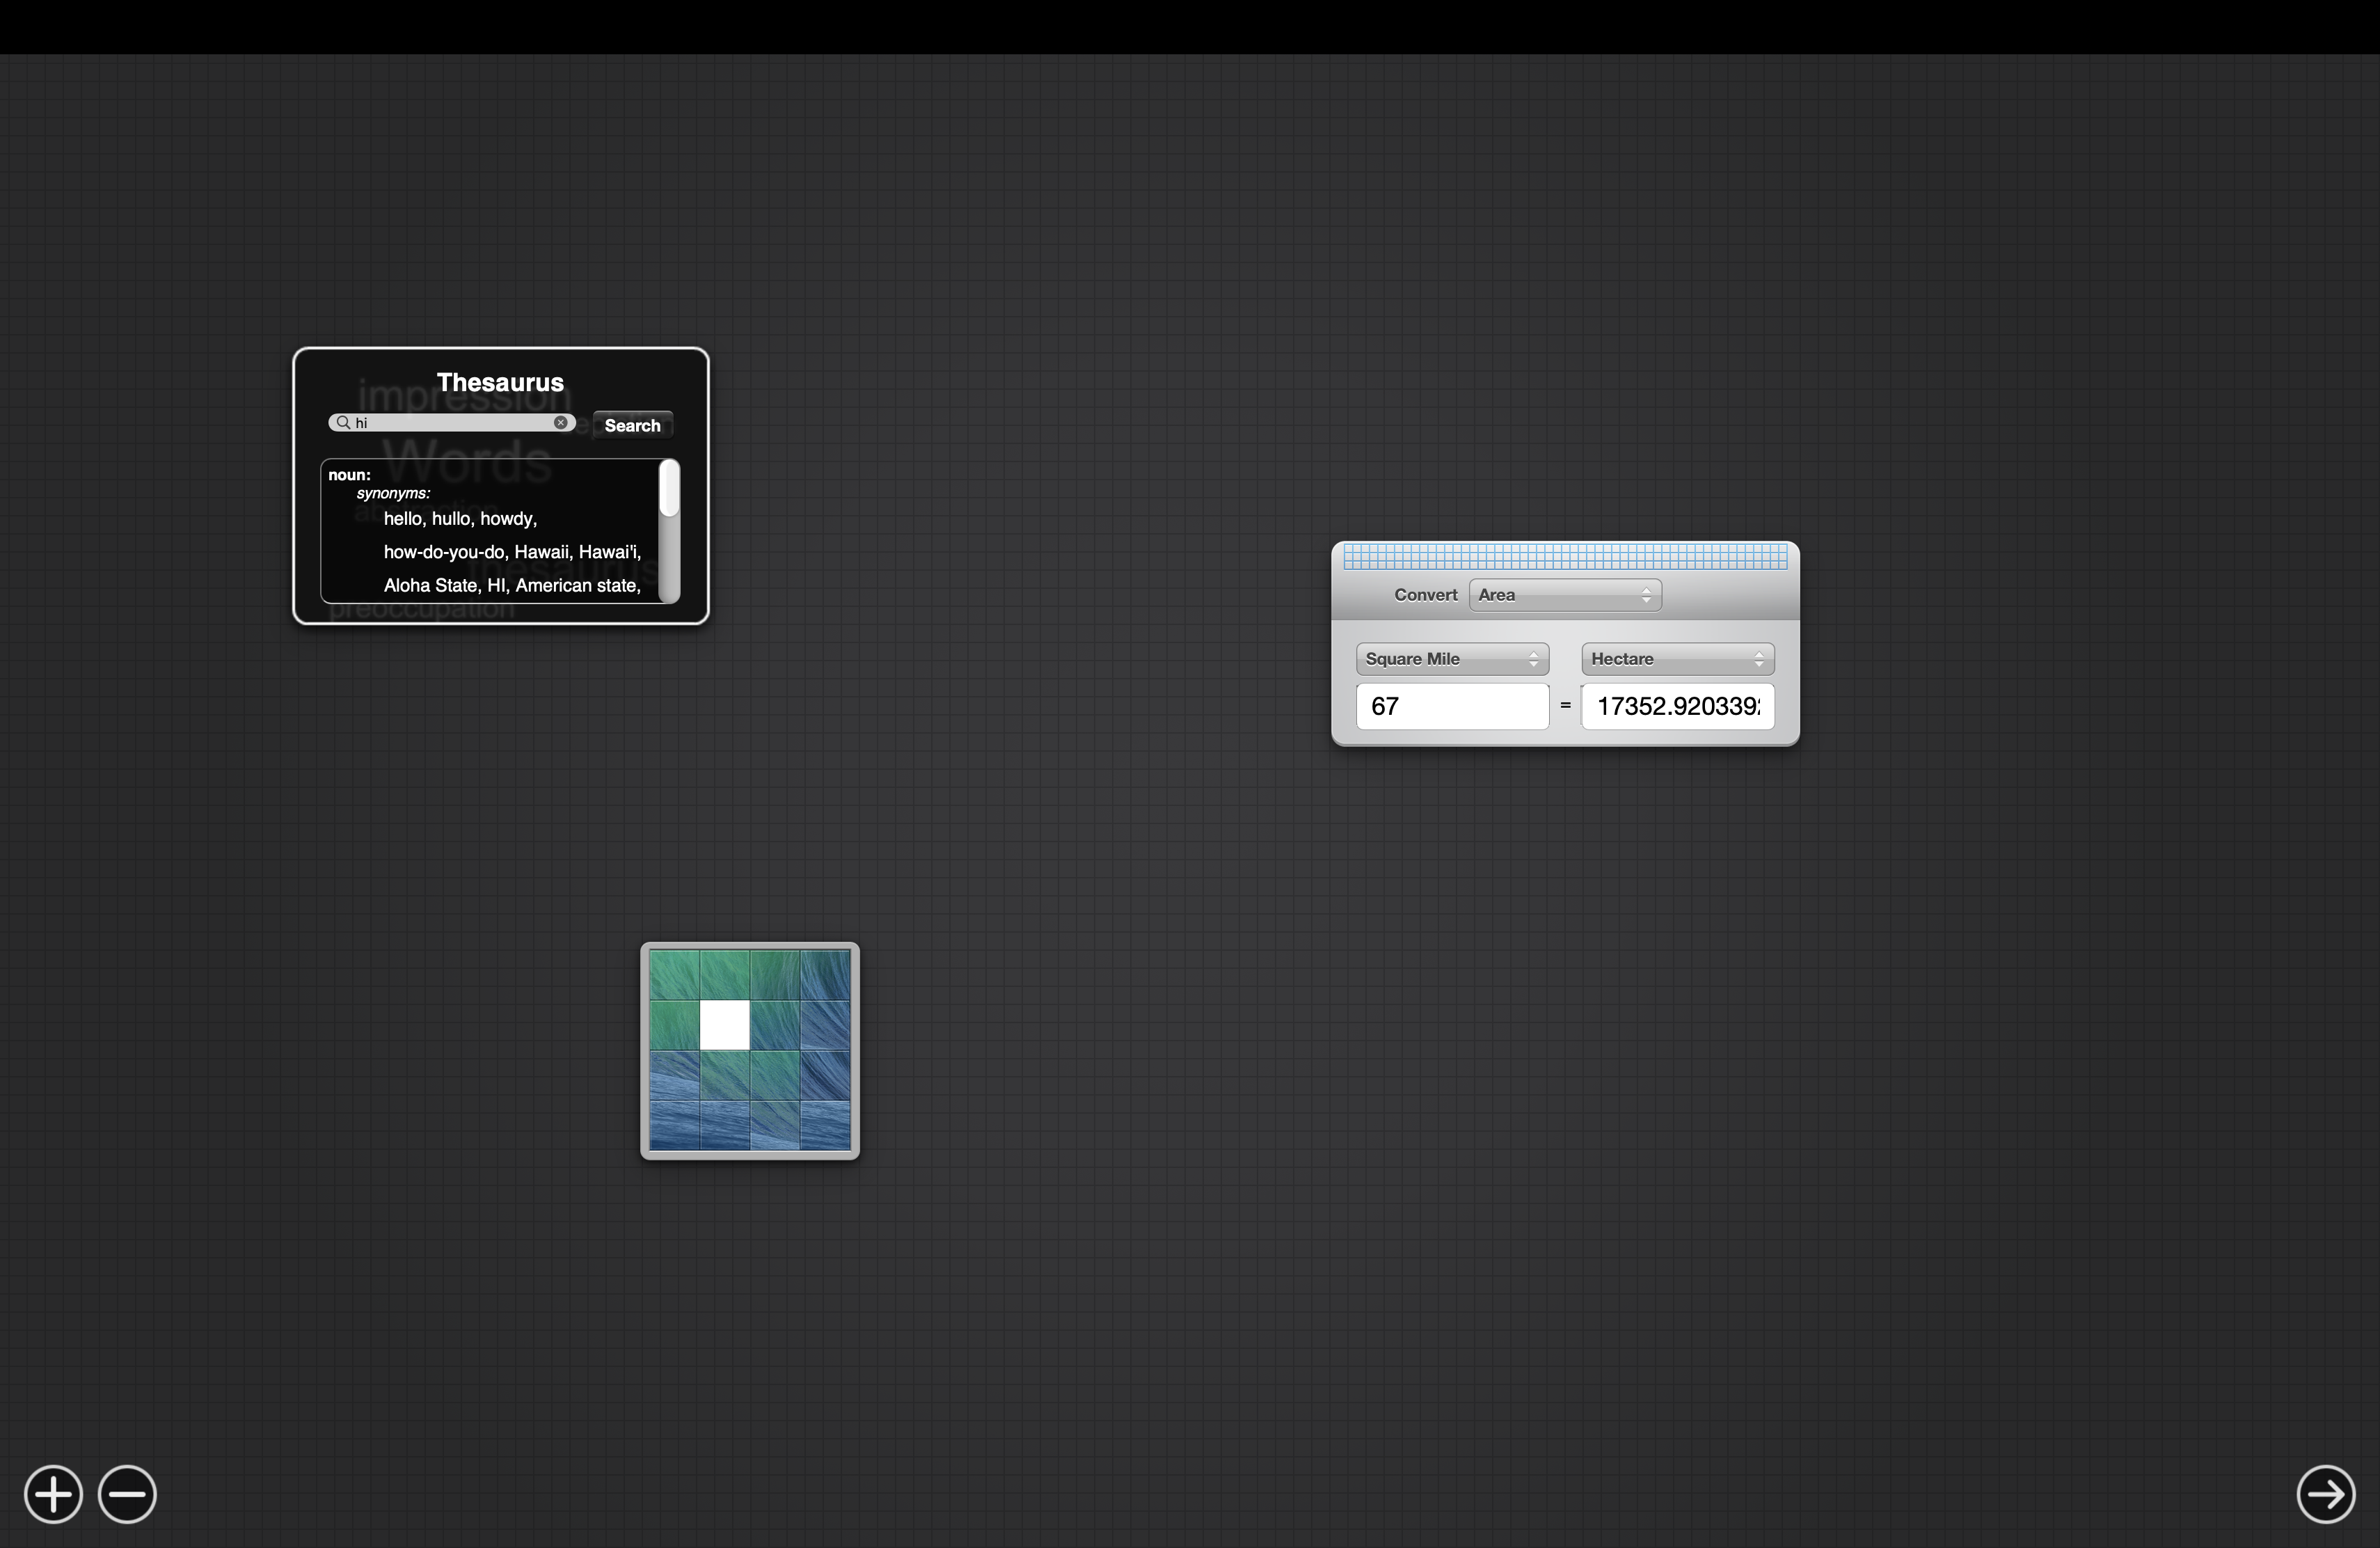
After pointing the wrapper to the MainHTML file and entering the correct window dimensions, the Stickies widget is fully functional too!
Restoring Dashboard APIs
There is also the Google widget - it originally redirected you to Google search in your default browser. It displays correctly with the same modifications as the previous widget, but does not actually work. Let’s see its code.
In Google.js:
function search (input)
{
  var value = input.value;
  if (value.length > 0)
  {
    value = encodeURIComponent (value);
    var url = "http://www.google.com/search?q=" + value + "&ie=UTF-8&oe=UTF-8";
    if (window.widget)
      widget.openURL (url);
  }
}
The key line here is widget.openURL(url);. That method isn’t a standard JavaScript thing - it is one of the Dashboard’s API functions that help widgets interact with the system.
While it is pretty self-explanatory, its documentation can also be found in Apple’s Dashboard Reference:
Opens the specified URL in the user’s preferred browser.
widget.openURL(url)This method opens the specified URL and dismisses the Dashboard layer. This method does not permit the opening of URLs that use the file:scheme unless the AllowFileAccessOutsideOfWidgetkey is set in the widget’s information property list file.
However, since we’re not in the original Dashboard environment, it needs to be rewritten to work again. Luckily, WKWebView, which is what I used in the windowed example above, lets me inject my own JavaScript code into the widget.

We can inject our own function that sends the URL back to the host using this code:
let userContentController = WKUserContentController()

let scriptSource = """
window.widget = window.widget || {};
window.widget.openURL = function(url) {
    window.webkit.messageHandlers.openInBrowser.postMessage(url);
};
"""

let userScript = WKUserScript(
    source: scriptSource,
    injectionTime: .atDocumentStart,
    forMainFrameOnly: true
)
userContentController.addUserScript(userScript)
config.userContentController = userContentController
However, that is pointless if we don’t have a way to actually receive what was sent from the widget. Swift’s WKScriptMessageHandler comes in clutch here. It allows receiving messages from JavaScript code running in a webpage.
However, WKScriptMessageHandler by itself isn’t enough - it defines what method must exist, not where that logic should live. In setups such as our own, that logic is typically placed inside a coordinator.
A coordinator is a separate object that acts as a bridge between the WebKit view and the rest of the Swift code. It exists because SwiftUI views are structs and can’t easily conform to Objective-C-based delegate protocols like WKScriptMessageHandler. The coordinator, being a class, can.
class Coordinator: NSObject, WKScriptMessageHandler {
    func userContentController(_ userContentController: WKUserContentController, didReceive message: WKScriptMessage) {
        if message.name == "openInBrowser", let urlString = message.body as? String,
            let url = URL(string: urlString) {
            NSWorkspace.shared.open(url) // open in browser
        }
    }
}
Instead of creating an instance of the coordinator ourselves, Swift can automatically manage it. We just need to tell it how to make one:
func makeCoordinator() -> Coordinator {
    Coordinator()
}
With that, it automatically creates an instance when the custom WebView is initiated. We can use it as context.coordinator.
Then, right under userContentController.addUserScript(userScript) from our previous code, we register the coordinator as the message handler for openInBrowser:
userContentController.add(context.coordinator, name: "openInBrowser").
So the full flow is:
- SwiftUI starts the custom WebView.
- The custom JavaScript is injected, including the widget.openURL function.
- SwiftUI calls makeCoordinator() automatically and creates the coordinator instance.
- The coordinator is registered with the WebView via
userContentController.add(context.coordinator, name: "openInBrowser"). - The user types a search or triggers an action in the widget.
- The widget calls window.widget.openURL(url), which posts a message to the
openInBrowserhandler. - The WebView forwards the message to the coordinator.
- The coordinator receives the message in
userContentController(_:didReceive:). - The coordinator opens the URL in the default browser using
NSWorkspace.shared.open(url).
Now the Google widget is fully functional!
Going back to the Calculator widget, it is now broken. Why did emulating the openURL function break a widget that used to work perfectly?
Looking at the JS console shows: TypeError: undefined is not an object (evaluating 'calc.evaluateExpression'). Looking closer at the code reveals:
if (window.widget)
  result = widget.calculator.evaluateExpression (str, (directInput ? 16 : 8));
else
  result = eval(str);
That snippet checks if the widget is running in Dashboard. Since we recreated the widget object, it thinks it is, so it tries to use another function to calculate the expression. Why did Apple do this? Idk.
The fix is pretty easy:
widget.calculator.evaluateExpression = function(expr, mode) {
    try {
        if (expr === "decimal_string") return ".";
        if (expr === "thousands_separator") return ",";
        return eval(expr);
    } catch (e) {
        return "ERROR";
    }
};
There’s a few more similar undocumented functions. Kludgets has them all, even though I implemented most of them before I discovered that.
My final app has all functions, both documented and undocumented, recreated to the best of my abilities. Here are some notable ones:
- widget.system - Allows the widget to run shell commands. I added a basic permissions system for that too.
- widget.preferenceForKey - Preference system that allows widgets to store persistent data.
- widget.performTransition - Fancy animation for flipping to the back side.
- widget.resizeTo - Resizes the widget as sometimes the back side is a different size.
Here’s 3 resources that also really helped me with that:
- Apple’s Dashboard Reference - this contains documentation about most of the widget.* functions
- kludgets’ /resources/scripts/ directory - I discovered this way too late but it was still very helpful, it contained most of the stuff that wasn’t in Apple’s documentation
- “Find” function in a folder with a bunch of widgets to see what other functions there are and how they’re called
My App
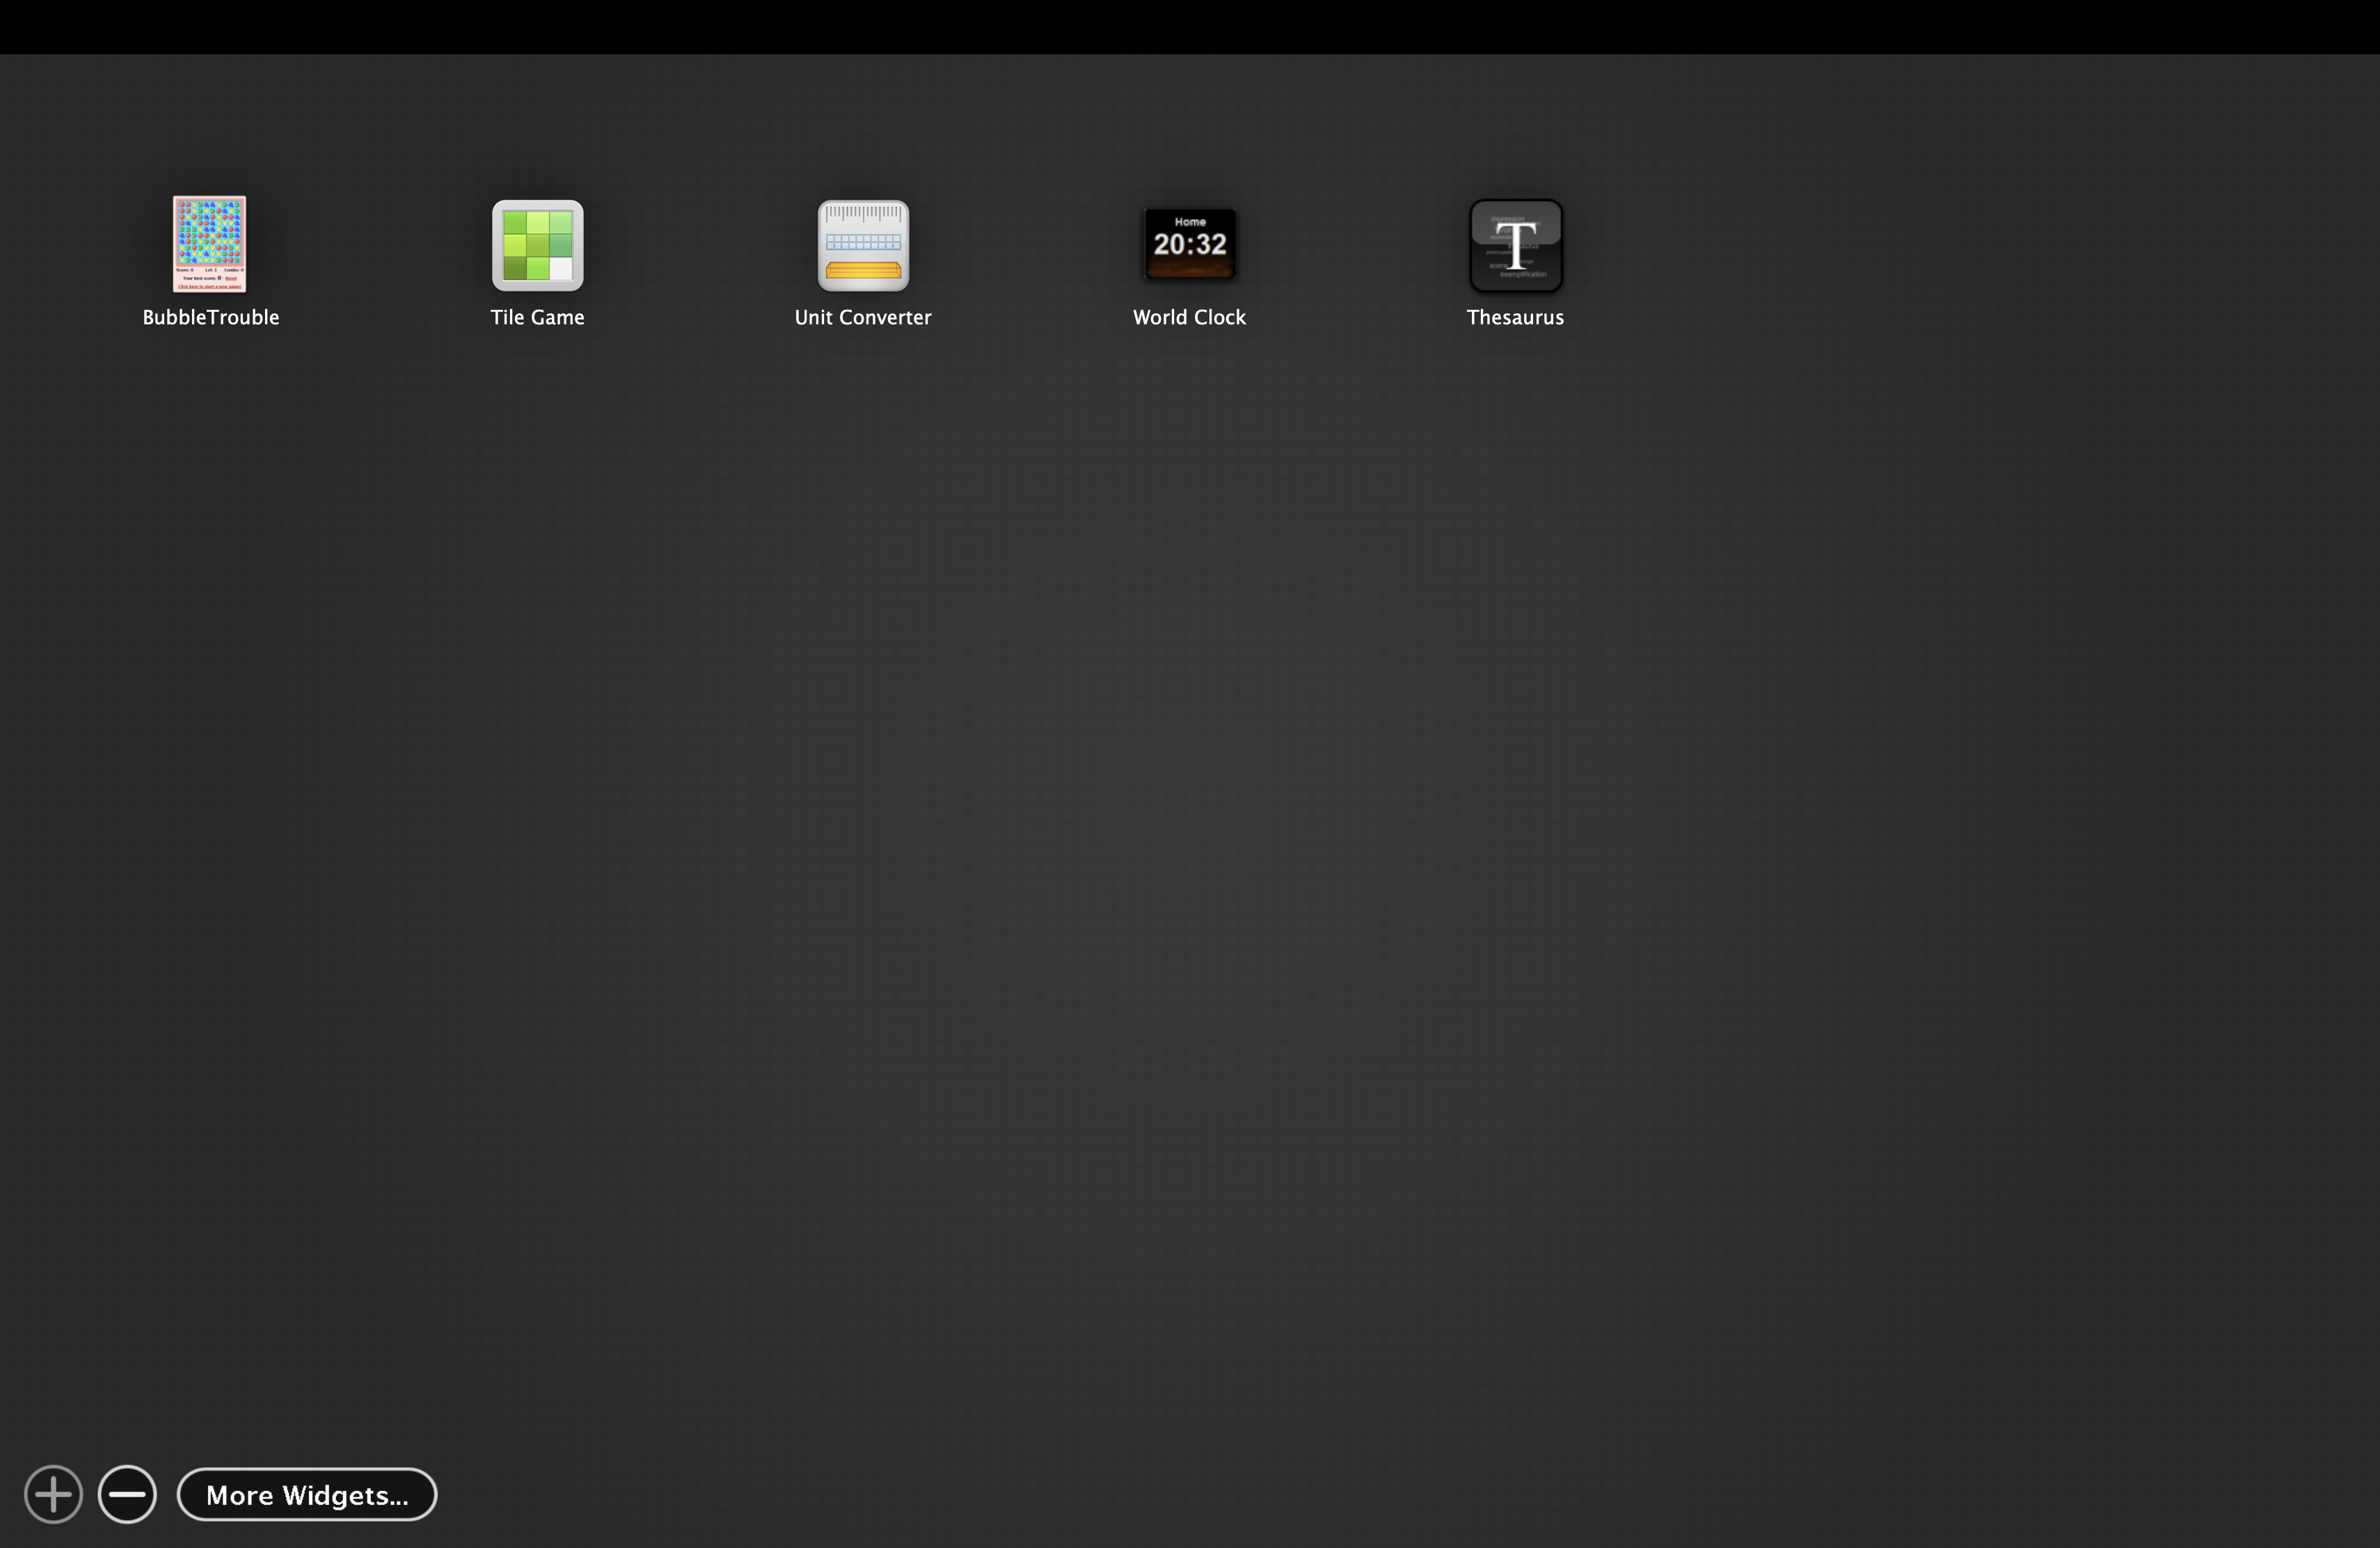
With all of that knowledge, I made an app with a simple interface to help you run widgets on macOS 12.0 or later.
The app automatically handles everything I talked about above - it recreates the Dashboard API, fixes all the path issues, windows the widgets with the correct size, and a bunch more.
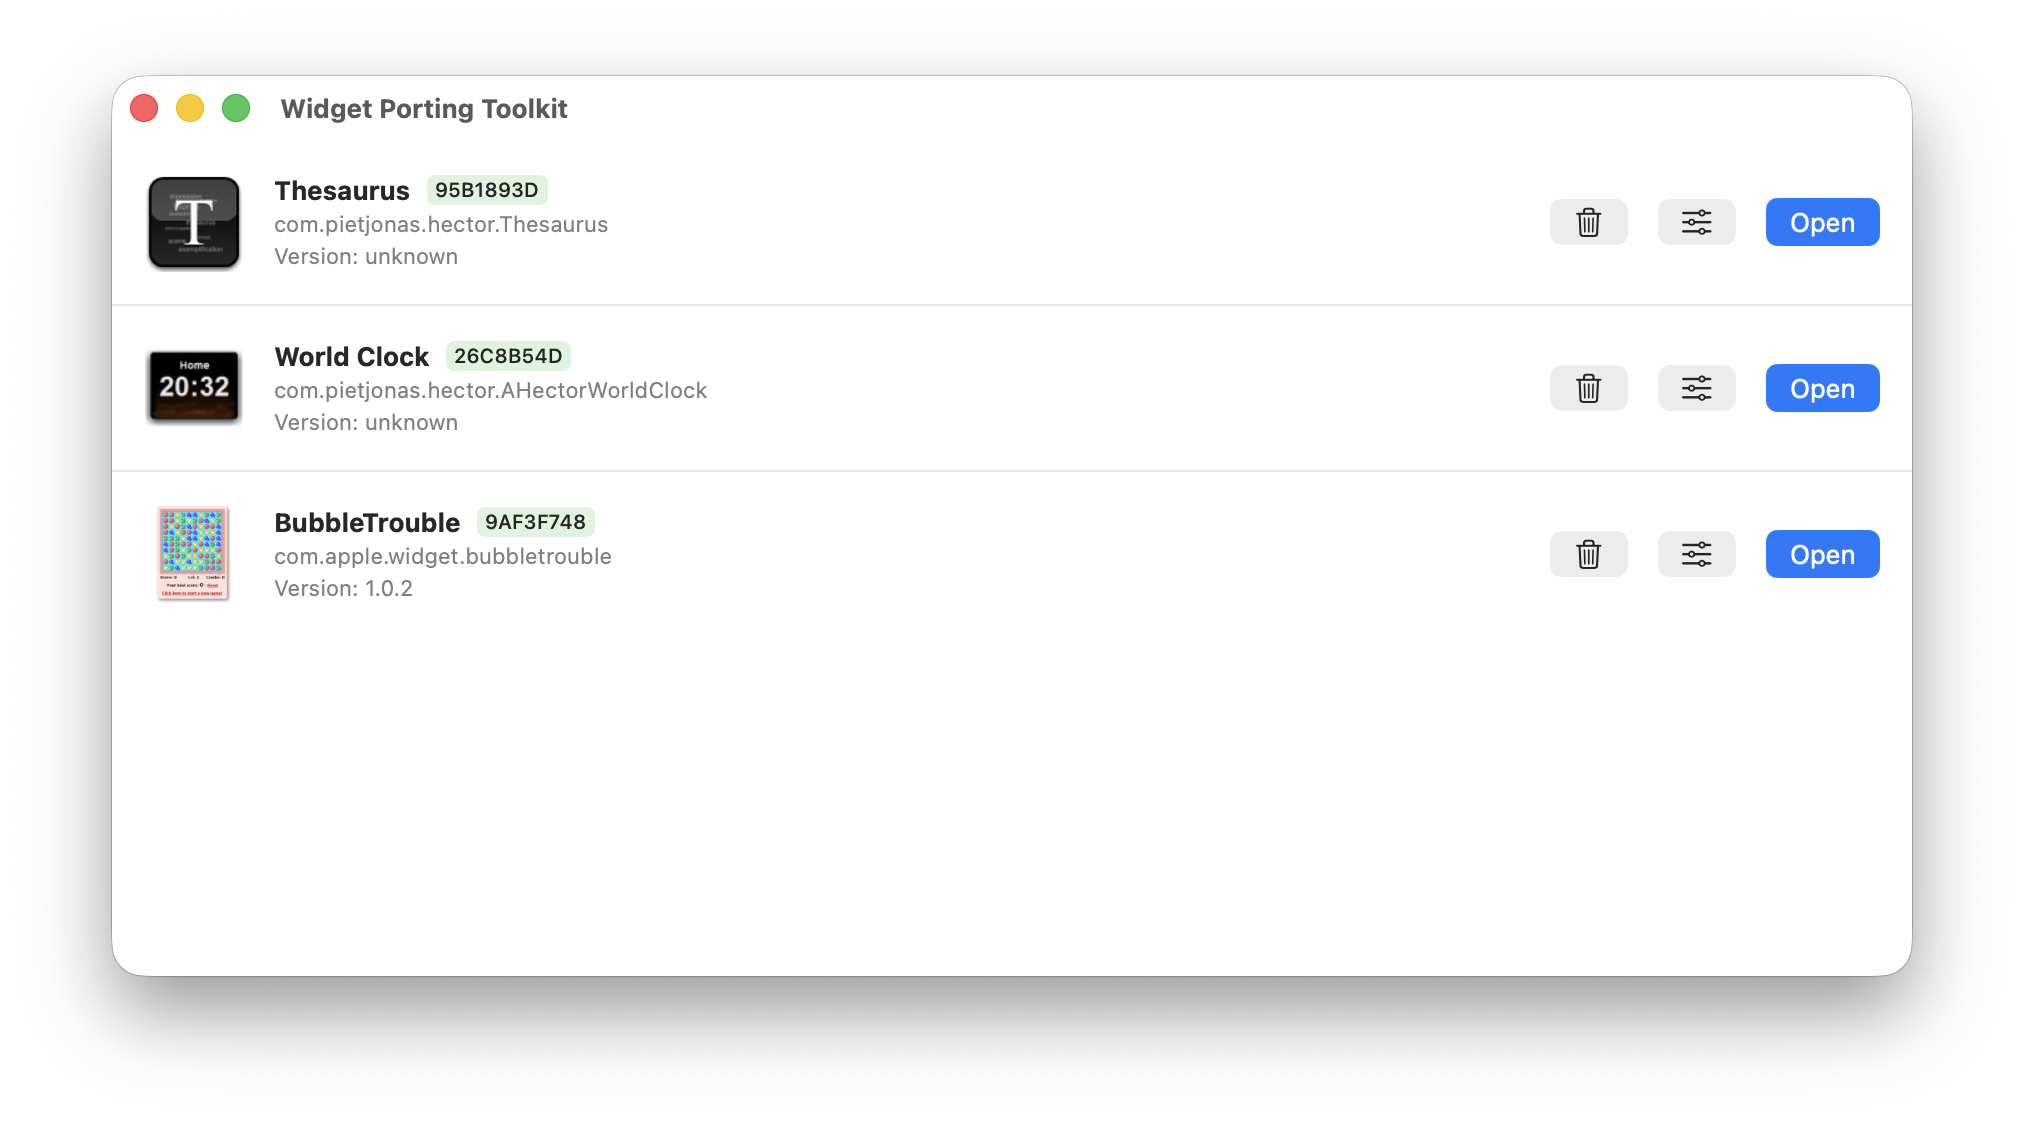
Using it is pretty simple - just drag a .wdgt bundle into the app and it’ll handle the rest.
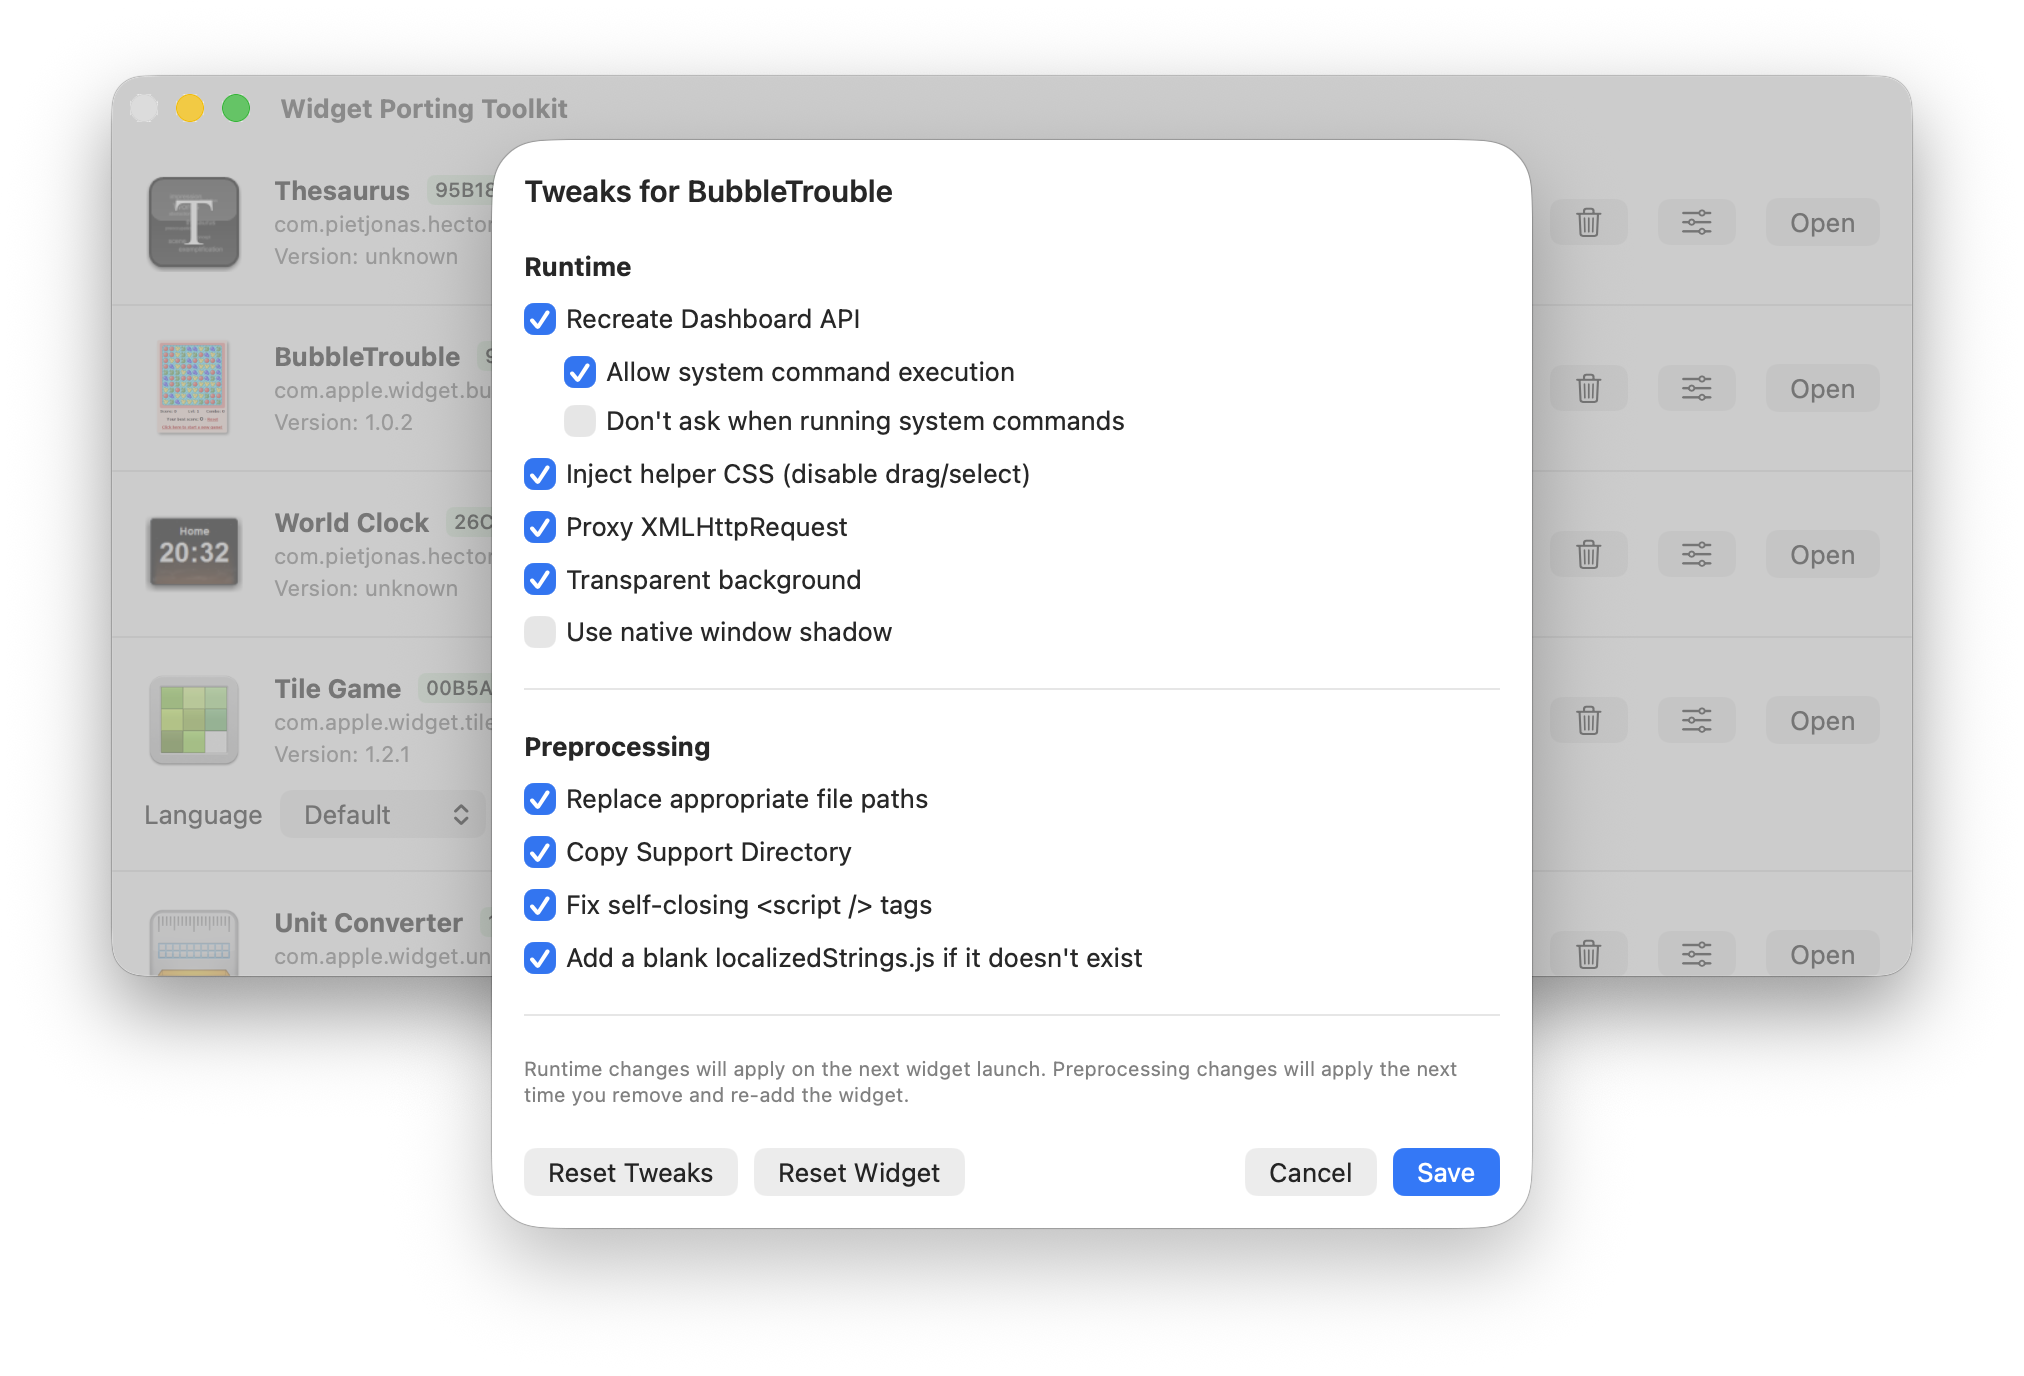
When you drop a widget in, the app copies it to a temp folder and does all the preprocessing automatically - replacing hardcoded system paths, fixing broken script tags, and injecting the JavaScript that makes the Dashboard API work again. Each widget gets its own settings too, so you can tweak things like window size or whether to use native shadows.
Oh, and I recreated the old fullscreen Dashboard UI too!
The whole thing is built with SwiftUI and WebKit, so it’s native and pretty lightweight. Works on macOS 12.0 or later, both Intel and Apple Silicon.
Links: